Comfy UI
Introduction #
ComfyUI is an opensource Nodes/graph/flowchart interface to experiment and create complex Stable Diffusion workflows without needing to code anything. In many cases it is superior to Automatic 1111 because it has a better memoery management, which allows you to create more complex nad larger and longer images and videos. Because it is workflow-based, this means that it is also highly customizable and can be extended with add-ons. This makes it a very powerful tool for artists and creators that want to experiment with AI and create new and unique pieces.
Installation #
You can find more information about how to install ComfyUI in your onw machine below:
It is reccomended to install the portable version in Windows. That should have everything you need to start generating images and videos.
If you are using a computer at K103, you don’t need to install ComfyUI. It is already installed in all the computers. But maybe you need to create a custom shortcut to the executable file.
Basic Usage #
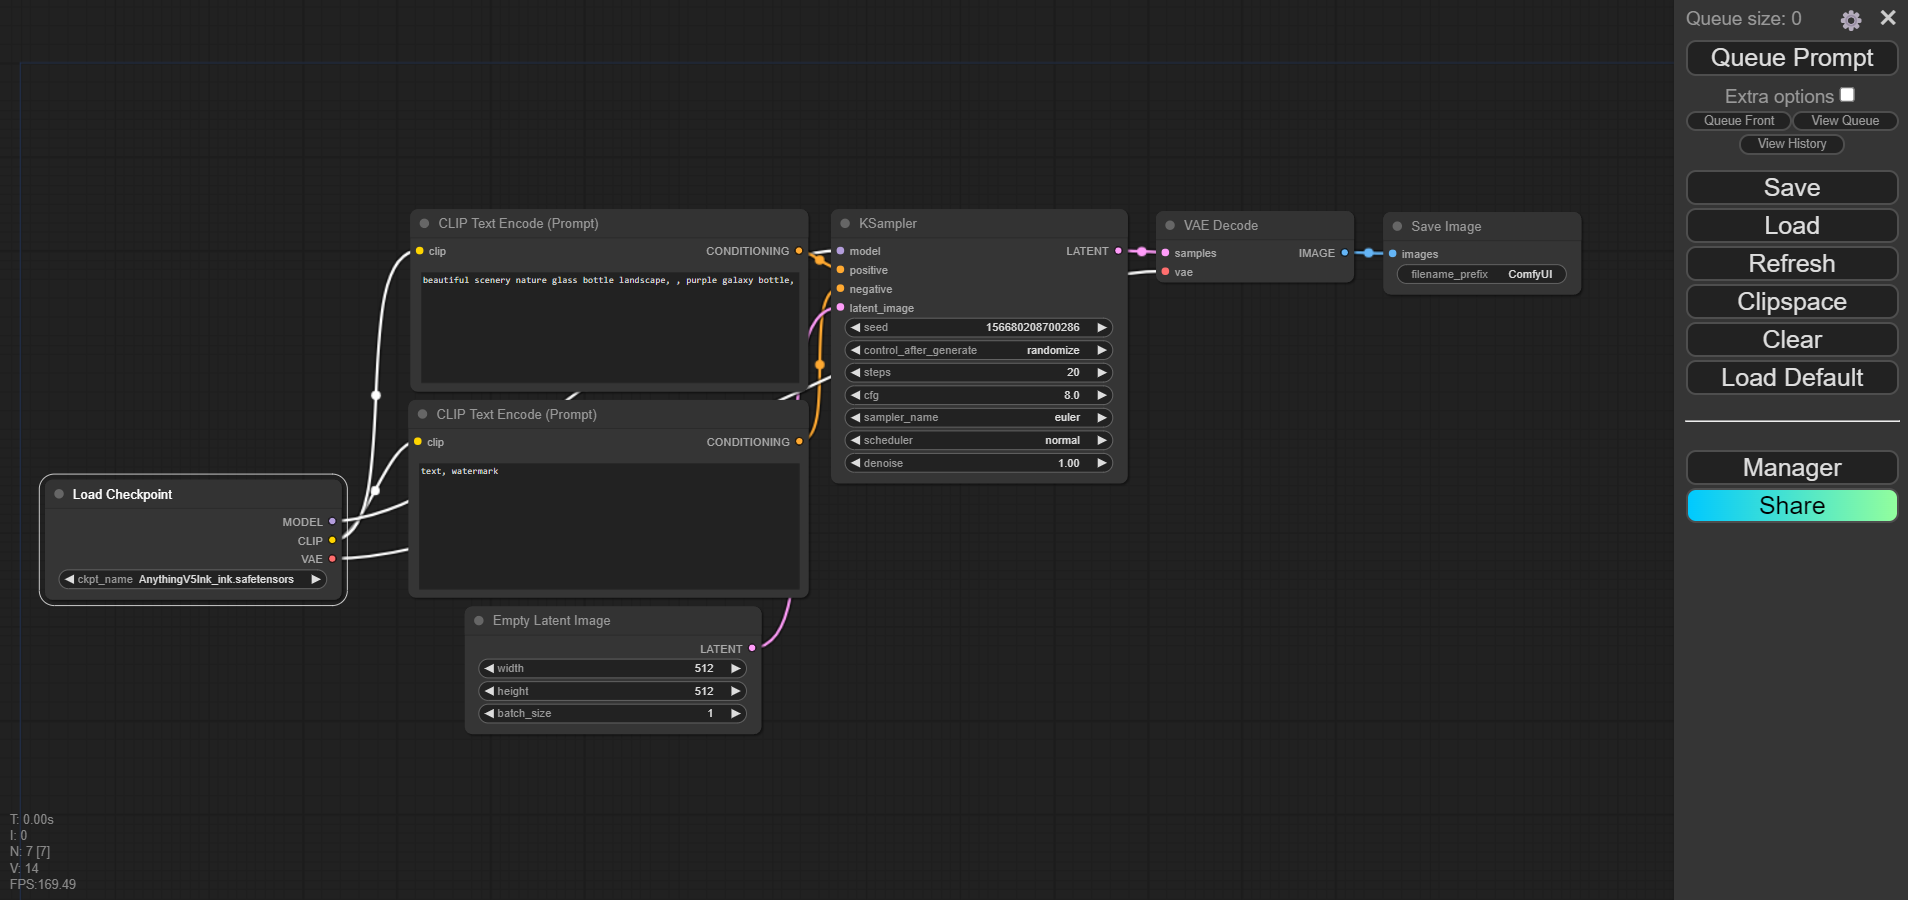
After learning how Automatic 1111 works, we can have a better graps of how ComfyUI can be operated. The basic idea is to create these “flows” of information, wheere we connect inputs (models, Loras, parameters, etc…) to outputs (fucntions, samplers, renderers etc…).
Models and Parameters #
The paarameters work the same way as
You can find the base models here:
And community models(checkpoints, Loras, embeddings) here:
Workflows #
ComfyUI works byt reading a JSON configuration file. This is called a workflow. These workflows can be uses in the form of an image or a txt file.
To start using a workflow we press the “Load Default” button. This will load a default workflow that we start modifying. Additionally, we can drag and drop and image or txt file containing a workflow into the ComfyUI interface, or press the “Load” button to load a workflow from a file.
It is reccomended to press the “Refresh” button after loading a workflow to make sure that all the nodes are correctly displayed, and all the models are correctly loaded.
You can find plenty of workflows in the “Workflows” folder in the GenAI course Folder in OneDrive. Addtionally you can find more workflows and some resources about how to crete workflows below:
- Comfy Workflows
- OpenArt Workflows
- Rundiffusion Workflows
- ComfyUI Workflows
- CivitAI Workflows
- ComfyUI ICU Workflows
Add-ons #
ComfyUI can be easily extended with add-ons. These add-ons can be used to create new workflows or to modify existing ones. The most important add-on is the ComfyUI Manager that you can find here:
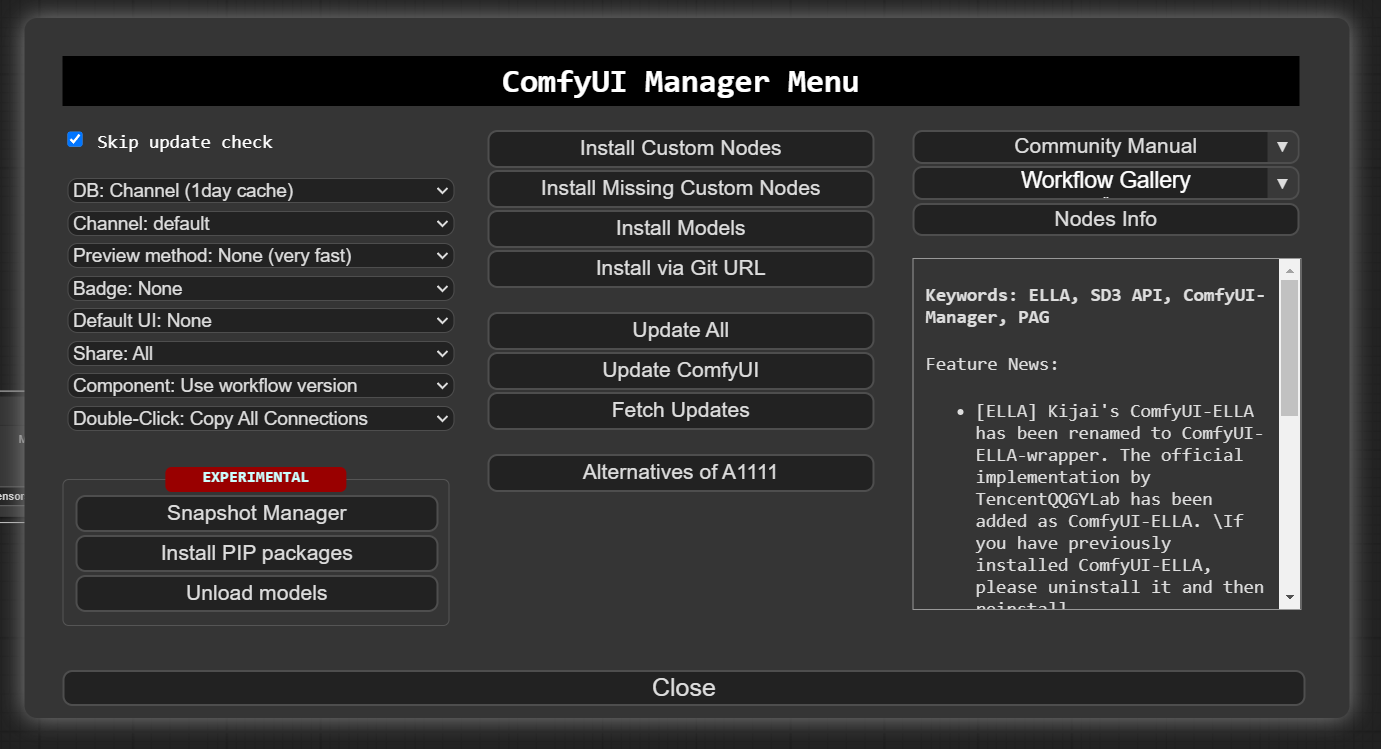
All the computers at K103 already have the ComfyUI Manager installed. It should appear as a tab on the sidebar of the ComfyUI user interface.
As we progress in our explorations of ComfyUi we will discovere more and more addons that can be used to extend its capabilities.Follow closely the Youtube tutorials and the documentation to install them correctly. However for aourn 95% of them the ComfyUI Manager is enough. You just have to press “Install Missing Addons” and you are good to go.
Krita #
Installation on K103 #
We can connect Krita to ComfyUI using the Krita-Comfy Plugin. This allows us to send images from ComfyUI to Krita and viceversa. This is very useful when we want to use e.g. our drwinsg in Krita and then apply some AI filters to them in ComfyUI.
If you want to install Krita and the Krita-Comfy Plugin in your own machine you can follow the instructions and find some examples of the usage below:
- Krita Download
- Krita Comfy Plugin
- Krita Comfy Required Models
- Hooking up Krita and ComfyUI
- Krita Comfy Realtime
- Acly Krita Youtube
All the computers at K103 already have the Krita-Comfy Plugin installed, however due to limitations on the computer rights we have to reinstall the plugin the first time we use it.
Animation #
Coming soon…
3D #
Coming soon…
TouchDesigner #
You can try to integrate your own API with python in TouchDesginer but by far the best way it to use the components created by DotSimulate file that includes ComfyUI. You can access their components by supporting them on Patreon.
API #
You can find information about using the API below: