Project Proposals | USB Communication (serial, keyboard, mouse, MIDI)
The class time was used for going through the project proposals.
Inspiration #
Serial #
Arduino has two built-in tools for receiving and/or sending serial data.
- Serial Monitor
- Serial Plotter
We have already used them both, mainly for seeing data printed from the sensors we use.
You can also use serial communication with other software on your computer.
Circuit #
- Light sensor connected to pin A0
- The VL53L1X distance sensor connected to the I2C bus using the Qwiic connector
We have this done with our robot we built last week so just keep that connected.
Arduino Code #
Upload the following code to your board. It reads the two sensor data and prints out the data on one line with the values separated by a comma.
// add all necessary libraries
#include <Wire.h>
#include <Adafruit_MSA301.h>
#include <Adafruit_Sensor.h>

// Comment/Uncomment as needed for specific MSA being used:
// Adafruit_MSA311 msa;
Adafruit_MSA301 msa;

float x,y,z;

void setup() {
  // put your setup code here, to run once:
  Serial.begin(115200);
  if (! msa.begin()) {
        Serial.println("Failed to find MSA301/311 chip");
        while (1) { delay(10); }
    }
  Serial.println("MSA301/311 Found!");
}

void loop() {
  // put your main code here, to run repeatedly:
    // get X Y and Z data at once
    msa.read();

    x = msa.x;
    y = msa.y;
    z = msa.z;

    // print the values
    Serial.print(x);
    Serial.print(",");
    Serial.print(y);
    Serial.print(",");
    Serial.println(z);
    delay(50);
}
Make sure you close all Serial Monitors from the Arduino IDE before testing in other software.
Option #1: p5.js code #
We can use the p5.webserial library to communicate with the Arduino board directly from the browser. See the documentation of the library.
You can create a p5.js sketch to read the data from the serial port. This works with the online editor as well.
Note that you have to use a browser that supports the Web Serial API, such as Chrome, for this to work.
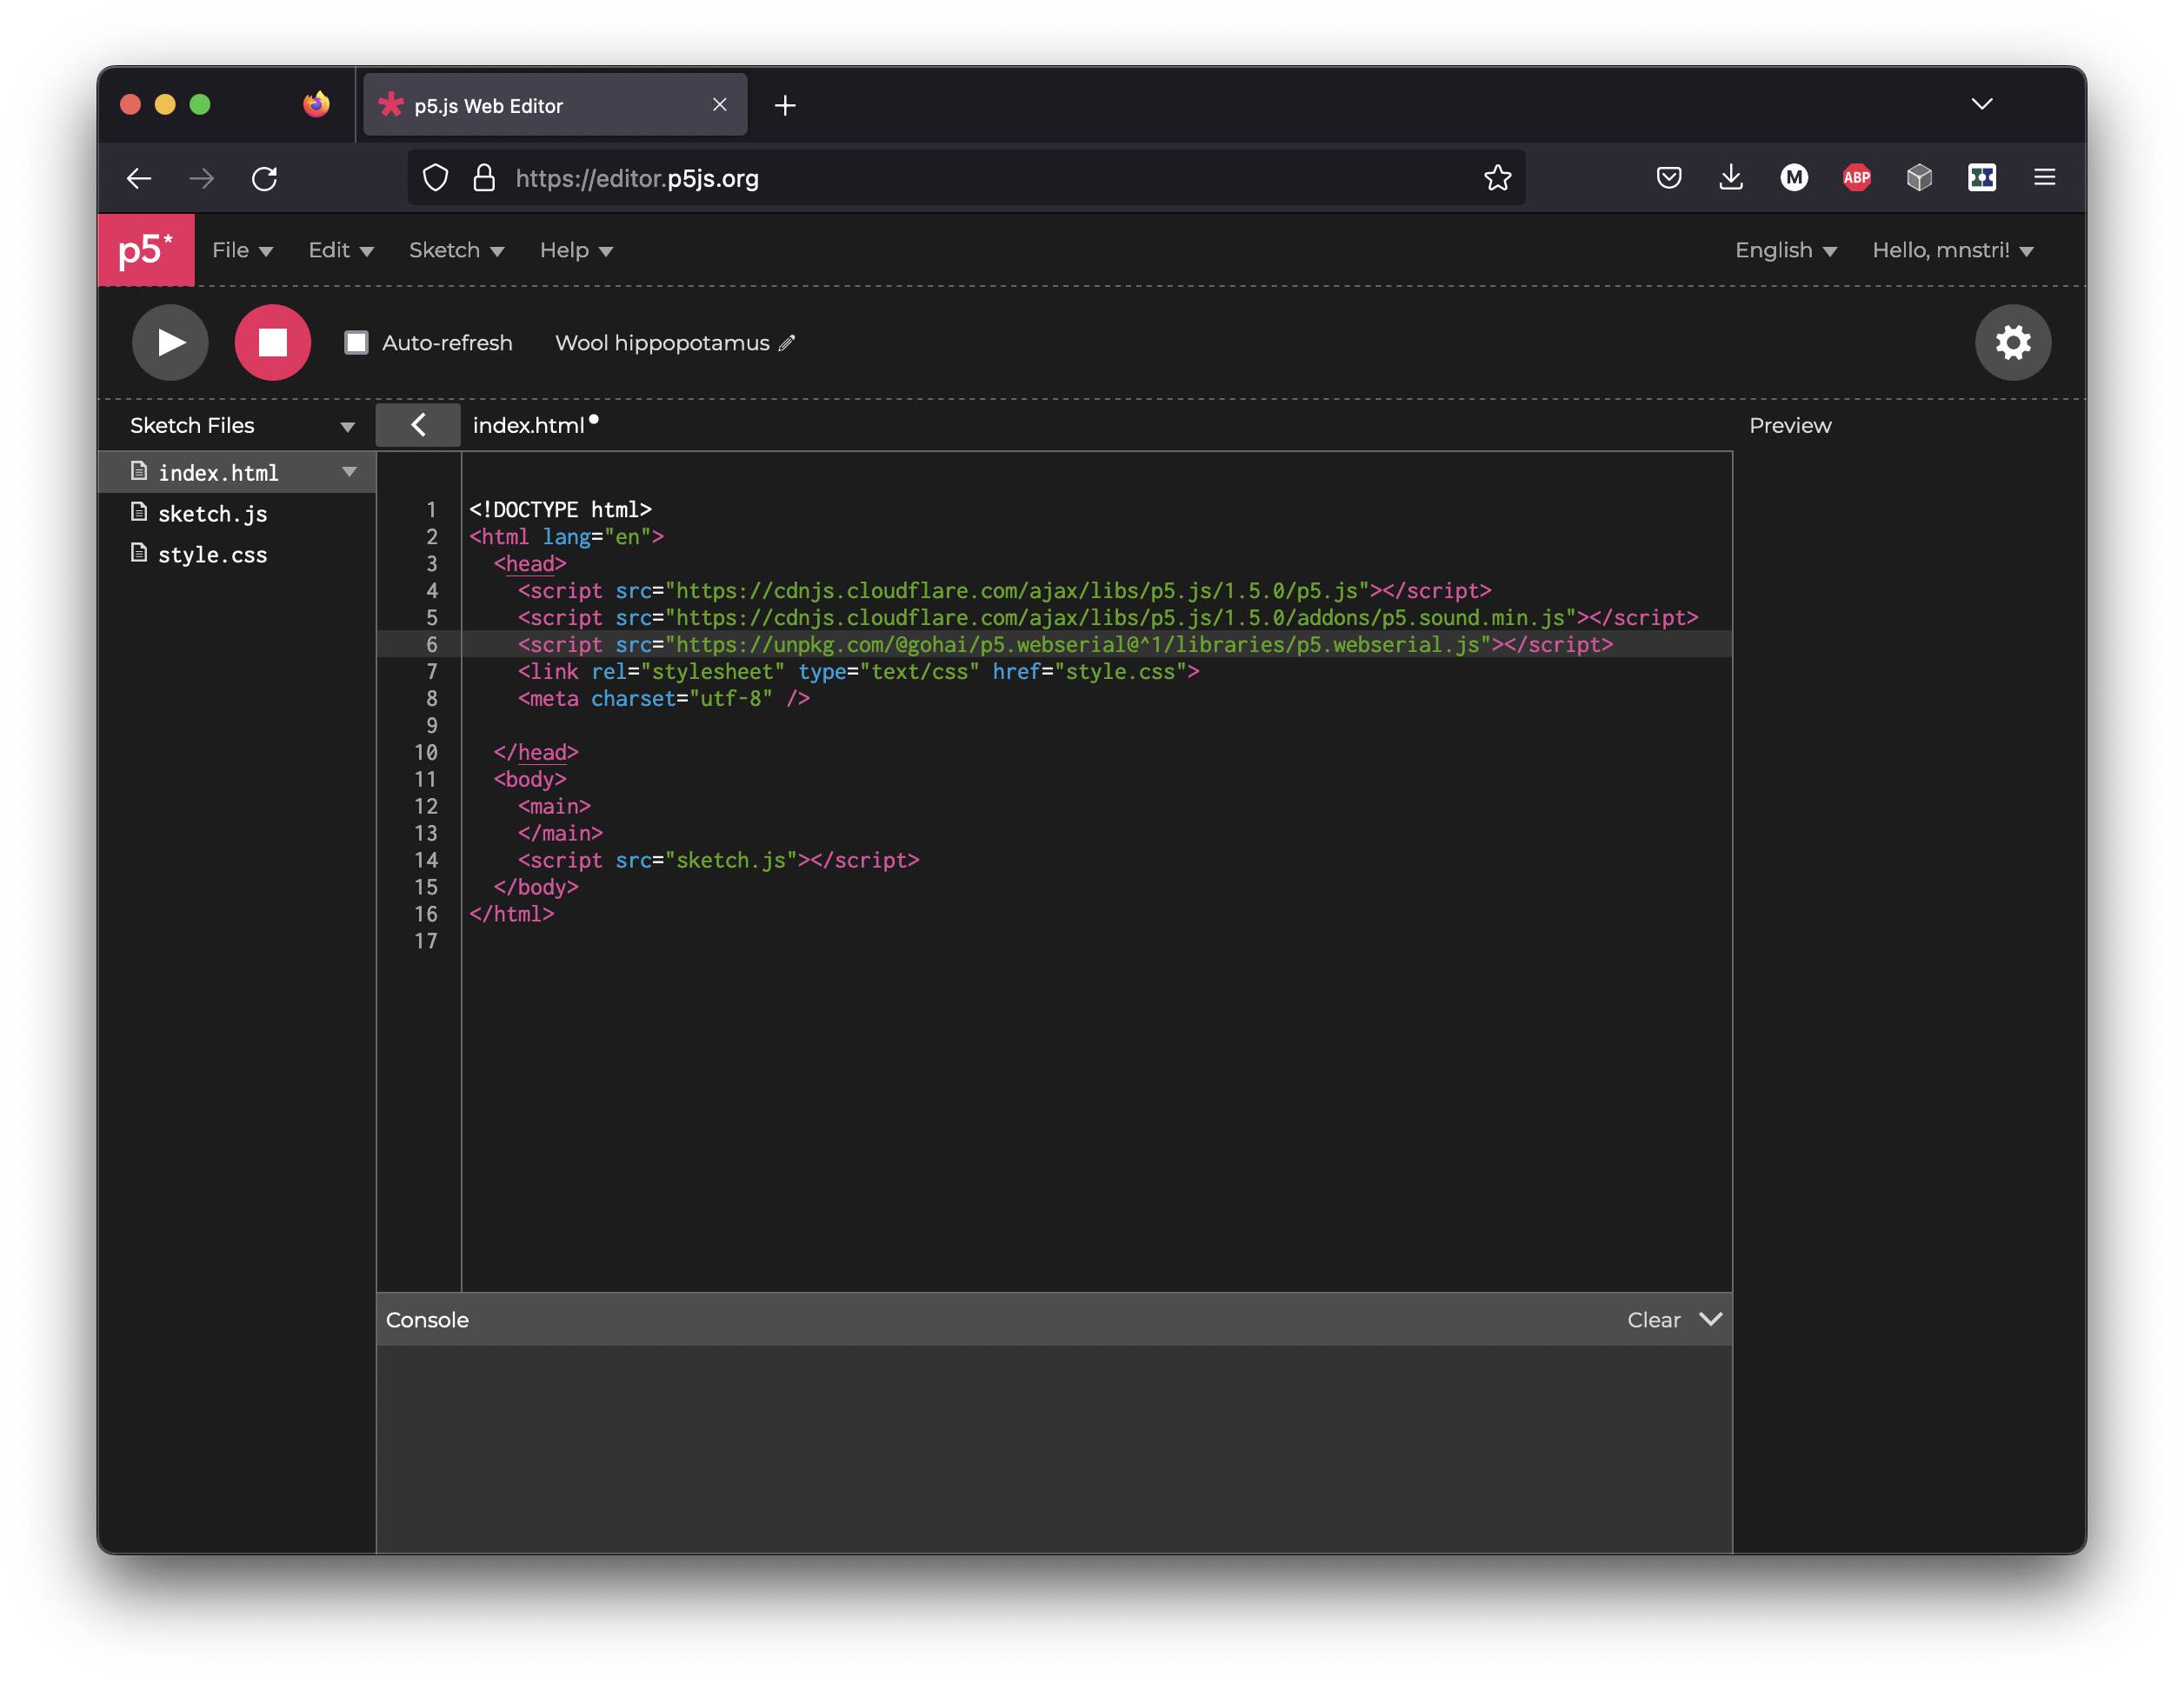
First, open the index.html file and add the following inside the head tags to include the library:
<script src="https://unpkg.com/@gohai/p5.webserial@^1/libraries/p5.webserial.js"></script>
Then use the code below. If everything went as expected, you should be able to connect to your Arduino and see the data coming in.
Open the example in the p5.js editor.
let port;
let x,y,z;
let c;
let s=10;
let circleX=0;
let circleY=0;

function setup() {
  createCanvas(400, 400);
  port = createSerial();
  c = color(255);
}

function draw() {
  background(130,70,90);

  if(port.available()>0){
    let str = port.readUntil("\n");
    //console.log(str);
    let splitData = split(str, ',');
    x = splitData[0];
    y = splitData[1];
    z = splitData[2];
    port.clear();
    circleX = map(x,-2000,2000,0,width);
    circleY = map(y,-2000,2000,0,height);
  }

  fill(255);
  text("x: " + x,20,20);
  text("y: " + y,20,40);
  text("z: " + z,20,60);
  //fill(c);
  circle(circleX, circleY, 100);
}

function mousePressed(){
  if (!port.opened()) {
    port.open(115200);
  }
}
Another p5.js example #
Some other p5.js examples (open in Chrome)
- Eye Plops (this one uses the same Arduino code as above)
Option #2: Processing code #
You can also do the same thing using Processing. The Serial library comes built-in with Processing so you don’t need to install anything extra. Just include the library in your code.
import processing.serial.*;

Serial myPort;  // Create object from Serial class
String str;      // Data received from the serial port
float x,y,z;
float circleX;
float circleY;
float s=100;

void setup(){
  size(500, 500);
  // Open whatever port is the one you're using.
  // Change the 0 in  Serial.list()[0] to the correct device
  printArray(Serial.list());
  String portName = Serial.list()[5];
  myPort = new Serial(this, portName, 115200);
}

void draw(){
  if ( myPort.available() > 0) {  // If data is available,
    str = myPort.readStringUntil('\n');         // read it and store it in str
    if(str != null){
      String[] splitData = split(str, ",");
      x = float(splitData[0]);
      y = float(splitData[1]);
      z = float(splitData[2]);
      circleX = map(x,-2000,2000,0,width);
      circleY = map(y,-2000,2000,0,height);
    }
  }
  background(130,70,90);
  fill(255);
  text("x: " + x,20,20);
  text("y: " + y,20,40);
  text("z: " + y,20,60);
  circle(circleX, circleY, s);
}
Option #3: TouchDesigner Example #
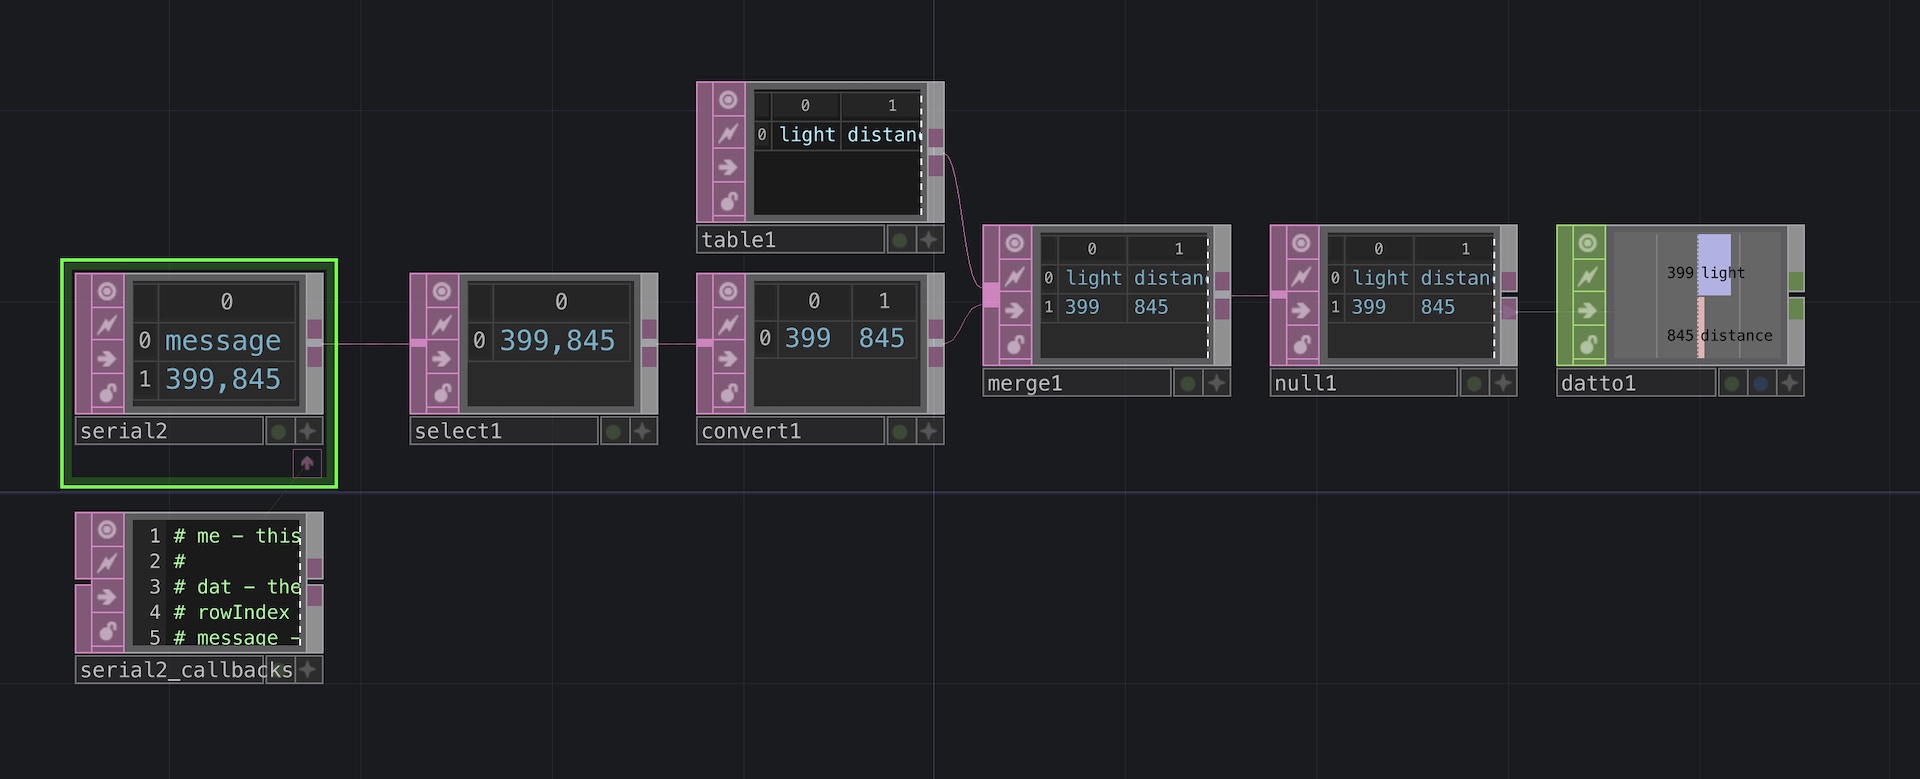
There are two ways to use serial communication in TouchDesigner:
- Using the Serial CHOP | This is useful when you are only receiving one value
- Usingt the Serial DAT | Use this for more complex cases or when you need to receive multiple values
Download a TouchDesigner example of reading the values from the Serial Port.
Keyboard #
You can make the Raspberry Pi Pico and Arduino Uno R4 WiFi boards appear as a USB keyboard for your computer.
Be careful with this. It’s quite easy to accidentally create something that is constantly typing something, which can make it really hard to reprogram your board.
Basic Project Setup #
#include "Keyboard.h"

void setup(){
  // initialize control over the keyboard:
  Keyboard.begin();
}

void loop(){
}
Sending individual keystrokes #
// Send an individual keystroke
Keyboard.press('a');
delay(1);
Keyboard.release('a');

// Use modifier keys
Keyboard.press(KEY_LEFT_SHIFT);
Keyboard.press('a');
delay(1);
Keyboard.releaseAll();
Sending text #
// use println() to write text followed by a newline character
Keyboard.println("Hello world!");
Special keys #
You can find the full list of supported special keys here.
Example #
#include "Keyboard.h"

void setup(){
  // initialize control over the keyboard:
  Keyboard.begin();
}

void loop(){
  delay(5000);
  Keyboard.print('a');
  delay(5000);
  Keyboard.press(KEY_LEFT_SHIFT);
  Keyboard.print('a');
  delay(100);
  Keyboard.releaseAll();
  delay(5000);
  Keyboard.println("Hello World!");
}
Mouse #
Be careful with this. It’s quite easy to accidentally create something that is constantly moving the mouse, which can make it really hard to reprogram your board.
#include <Mouse.h>

void setup() {
  // put your setup code here, to run once:
  Mouse.begin();
  delay(1000);
}

void loop() {
  // put your main code here, to run repeatedly:
  Mouse.move(100,100);
  delay(1000);
  Mouse.move(-100,-100);
  delay(1000);
}
Teensy Boards #
The Teensy boards are also capable of becoming various USB devices. The libraries for the Teensy boards generally work better than the built-in USB HID library from Arduino.
The Teensy Audio library even allows you to use your Teensy as a USB Audio Interface.