THU | Control Flow & Conditional Statements
- September 11, 2025
- 9:15–12:00
- Room 2420 (Marsio)
Inspiration #
Debugging, solving problems #
Sooner or later, you will get stuck, annoyed, frustrated, confused, or some other form of negative emotions when your code just does not work and you don’t know why. This is normal. You can choose to handle these situations calmly and focus on trying to solve the issues. There are several ways to approach this. Here are some recommendations
p5js: mouseIsPressed and keyIsPressed #
There are two new system variables built into p5js that we are going to need to use this week:
Conditional Statements #
A very large part of your code will depend on being able to set rules on when certain pieces of your code will run. That is where conditionals come into play.
Comparison Operators #
When setting up your conditions for
if statements, you need to compare values in different ways. These are the different comparison operators that we are going to need:
- Equal: == (note the two equal signs, don’t mix with assigning values!)
- Equal (strict equality): === (note the three equal signs, this is a JavaScript specialty that checks if the values AND the data types are equal.)
- Not equal: !=
- Not equal (strict inequality): !==
- Less than: <
- Less than or equal to: <=
- Greater than: >
- Greater than or equal to: >=
Do not mix these with the arrow function => which does something very different. We are nowhere near the stage where we would actually need to use or even understand the arrow function. For now, just don’t mix it up with the comparison operators above.
In general, it is recommended to use the strict equality===and strict unequality!==operators in JavaScript. However, in this class I’m going to generally use the loose versions==and!=This is because that is how they are written in other programming languages that we will be using throughout your studies, although many of these other languages actually behave more like the strict version. Confusing? Yes, a little bit. Just keep this in mind and be aware that you might sometimes run into strange or unexpected issues depending on which version you use.
if #
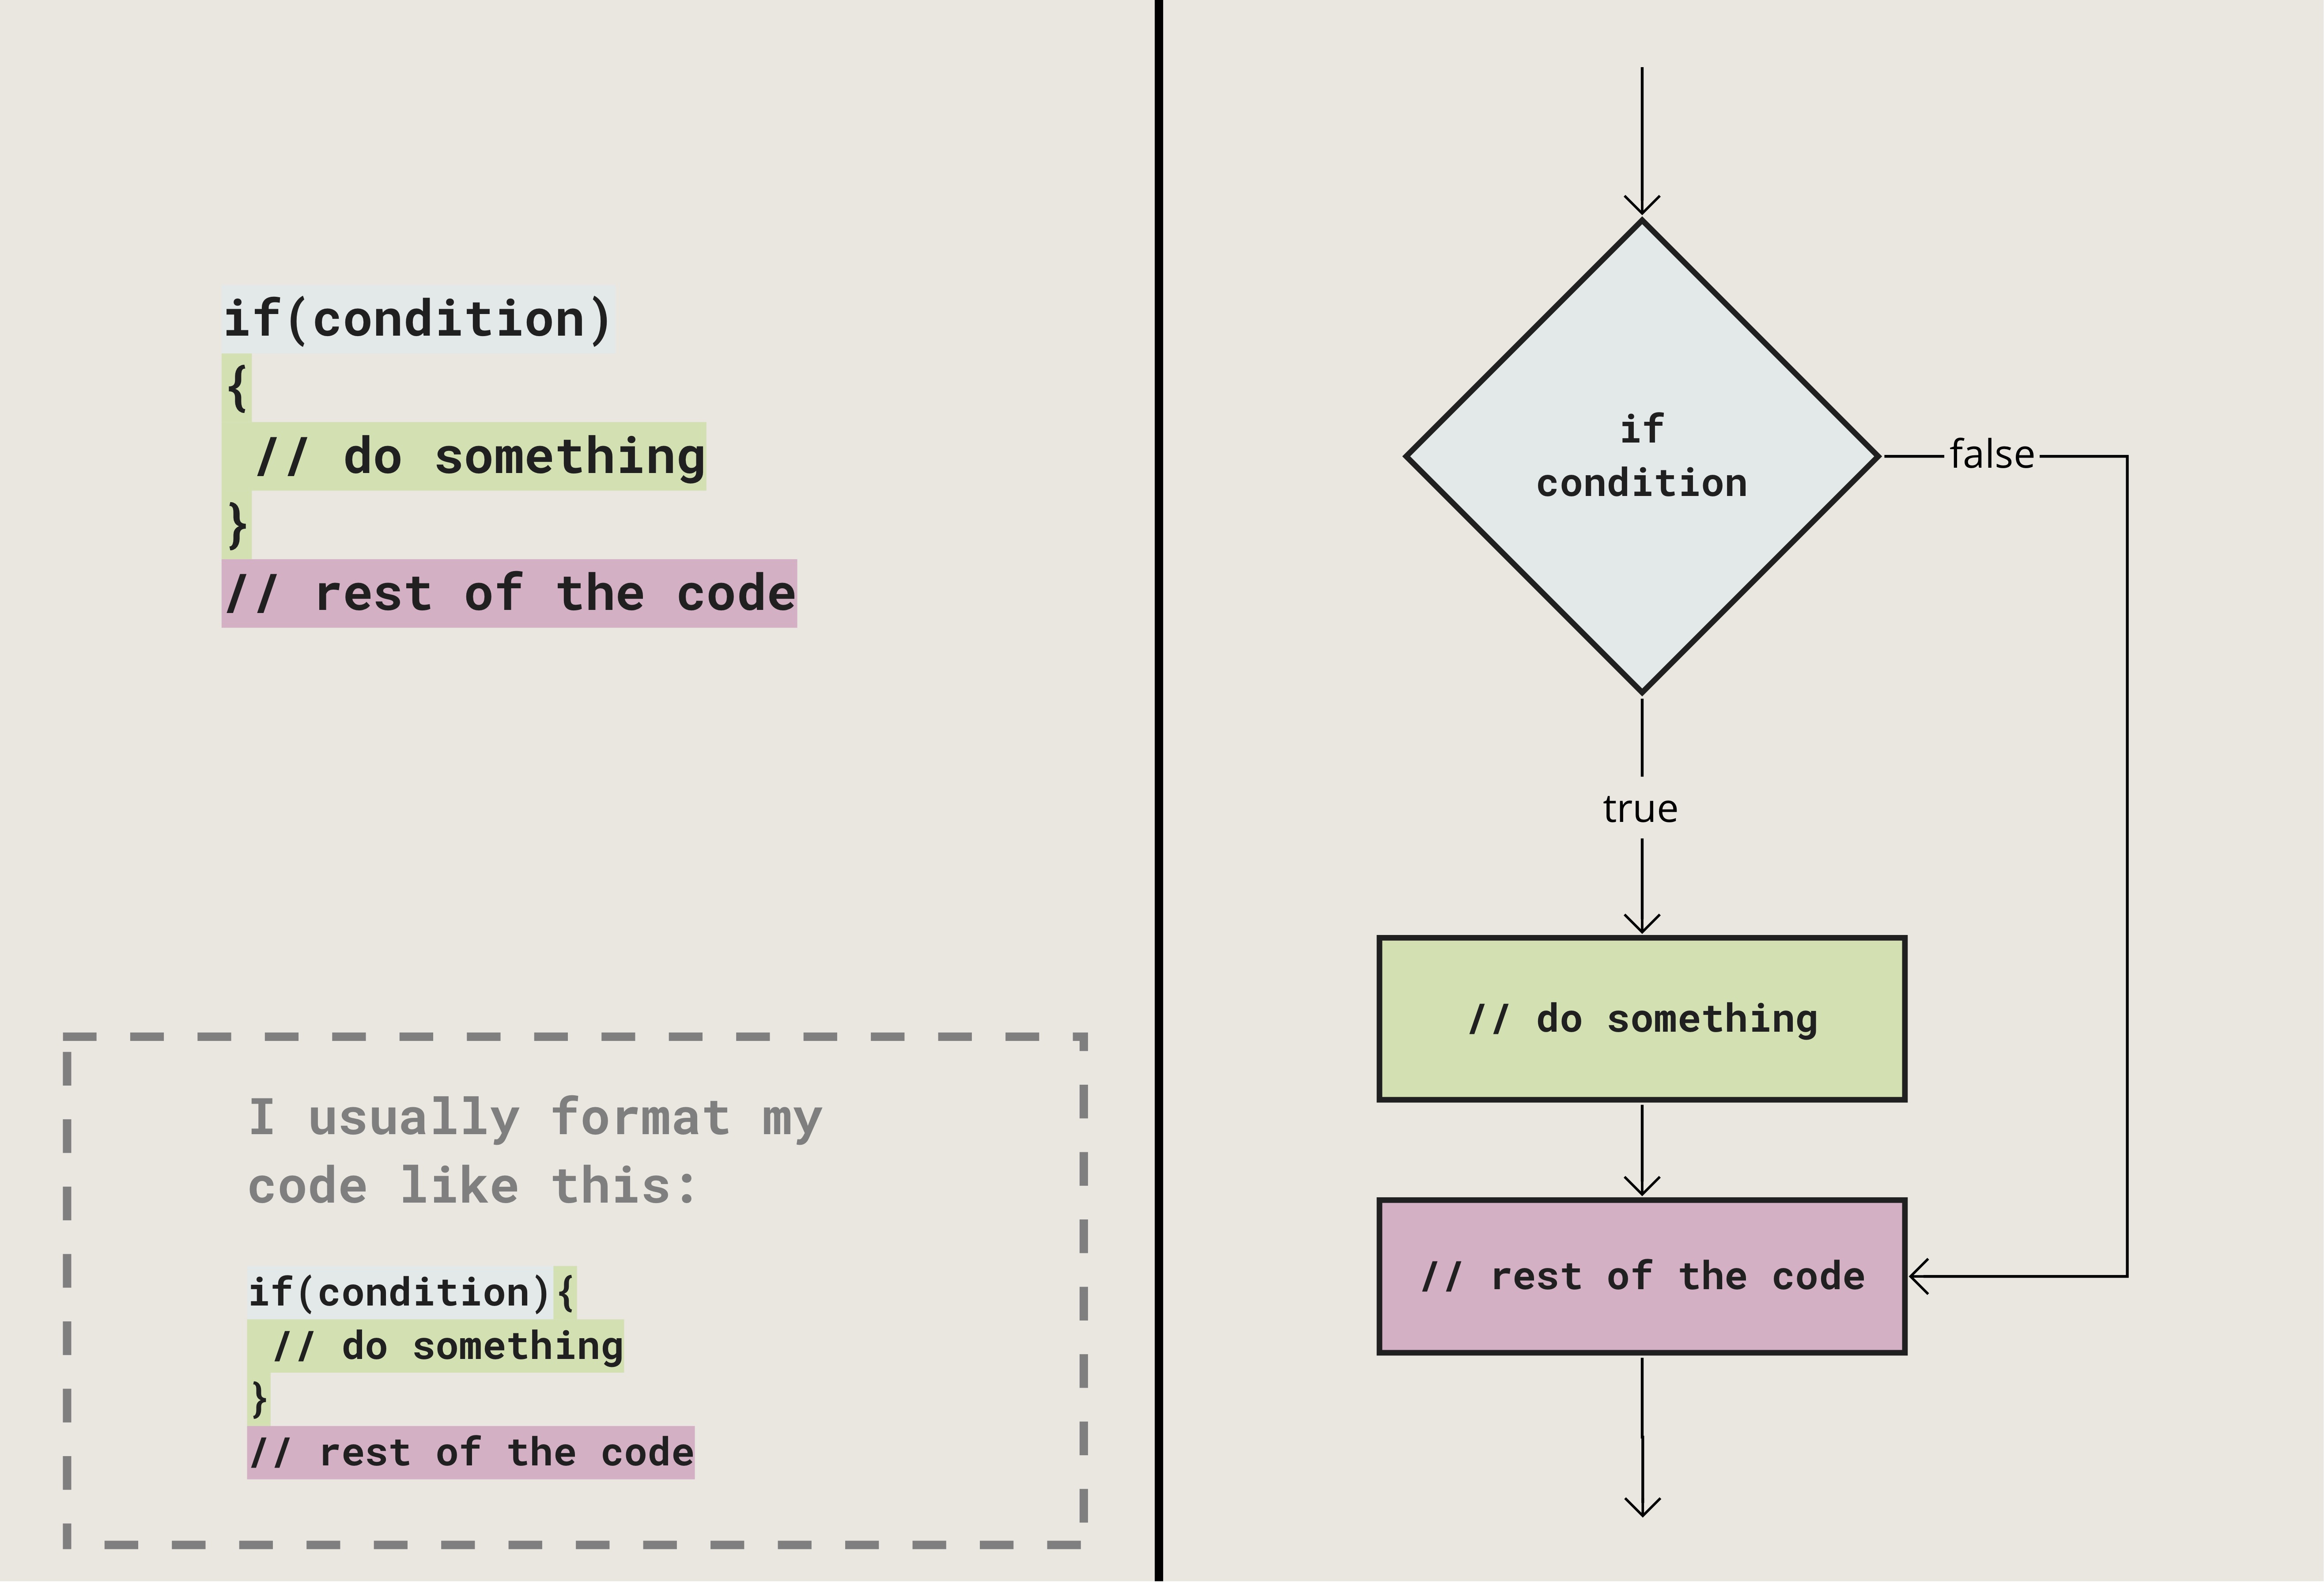
A very common structure in programming is the “if this then that” structure. You ask the code if some expression is true, if it is, then we execute a specific block of code.
if (condition) {
  // do something
}
The code inside the curly brackets is the block of code that runs if the condition evaluates to true. Or in JavaScript, I should say when the condition is truthy.
For example, you could ask if the x position of the mouse is less or greater than a certain value, or you could check if a specific key on the keyboard is pressed, or you could connect a light sensor to your code and trigger a sound file to play when the light level goes below a certain level.
A simple way to test how if statements work is to use the mouse. Just like mouseX and mouseY, mouseIsPressed is a system variable in p5js. It stores the information if the mouse button is pressed or not. The value is a boolean value, so it is either true or false.
The code below will simply print out a message in the console if the mouse button is pressed. If you you put this code inside your draw() function, the message will be printed as long as you hold down the button.
if (mouseIsPressed == true) {
  console.log("mouse is pressed!");
}
Example #01 | Drawing when mouse is pressed #
The simple drawing program we made during the last class can be extended by using mouseIsPressed and if.
if/else #
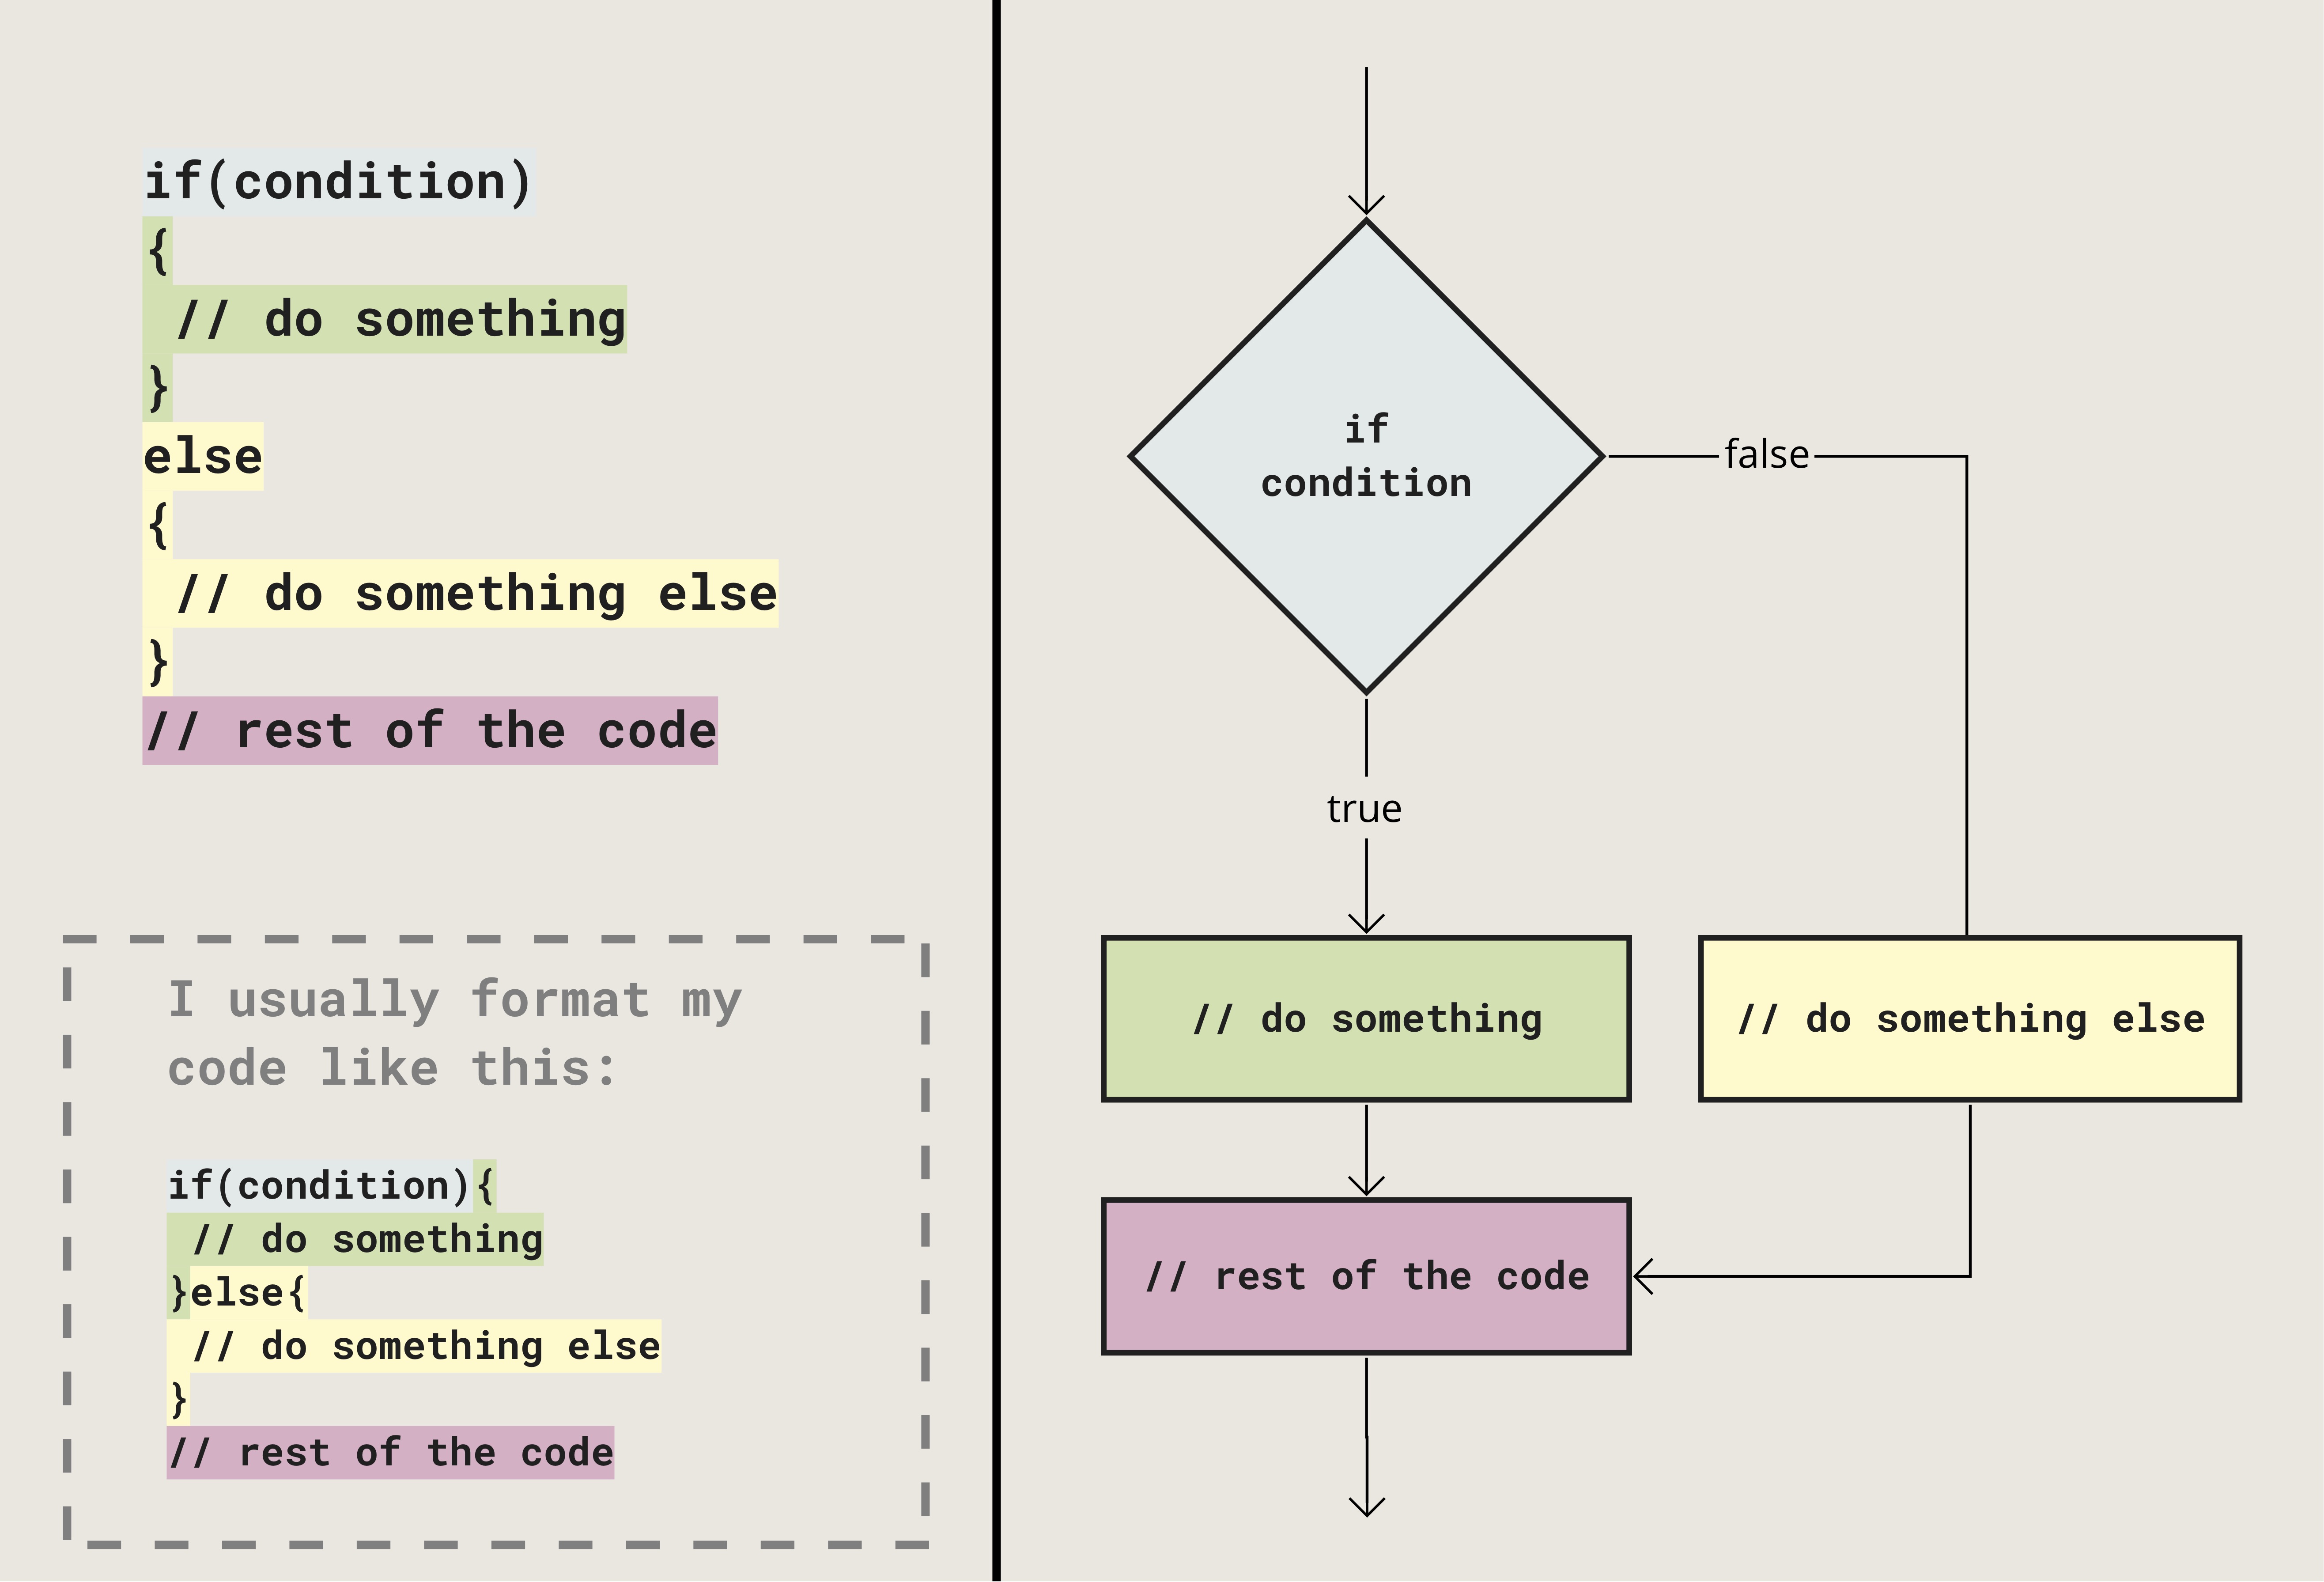
In many cases, just using if is enough, but you will soon run into situations where it is also necessary to have two different states in your program. That is where else comes in very handy. Use else to specify a block of code to be executed if the condition in the previous if is false.
For example, do two different things depending on if the mouse button is pressed or not.
Or check which side of the screen the mouse cursor is on.
Example #02 | Dividing the canvas in half #
This example continues on the previous one with the following additions:
- The size of the brush changes depending on which side of the canvas we draw on
- We use
keyIsPressedto clear the drawing. You can press any key. - We add some randomness to the color of the brush to make it a bit more interesting.
let circleSize = 60;

function setup() {
  createCanvas(windowWidth, windowHeight);
  background(130, 80, 130);
}

function draw() {
  if (keyIsPressed == true) {
    background(130, 80, 130);
  }

  // check which side of the cavas the mouse is on
  if (mouseX < width / 2) {
    circleSize = 80;
  } else {
    circleSize = 20;
  }

  if (mouseIsPressed == true) {
    noStroke();
    fill(random(10, 100));
    circle(mouseX, mouseY, circleSize);
  }
  fill(255);
  textSize(30);
  text("click and drag to draw\npress space to clear",20,50);
}
if/else if/else #
If you need to have three or more options, you can use the else if.
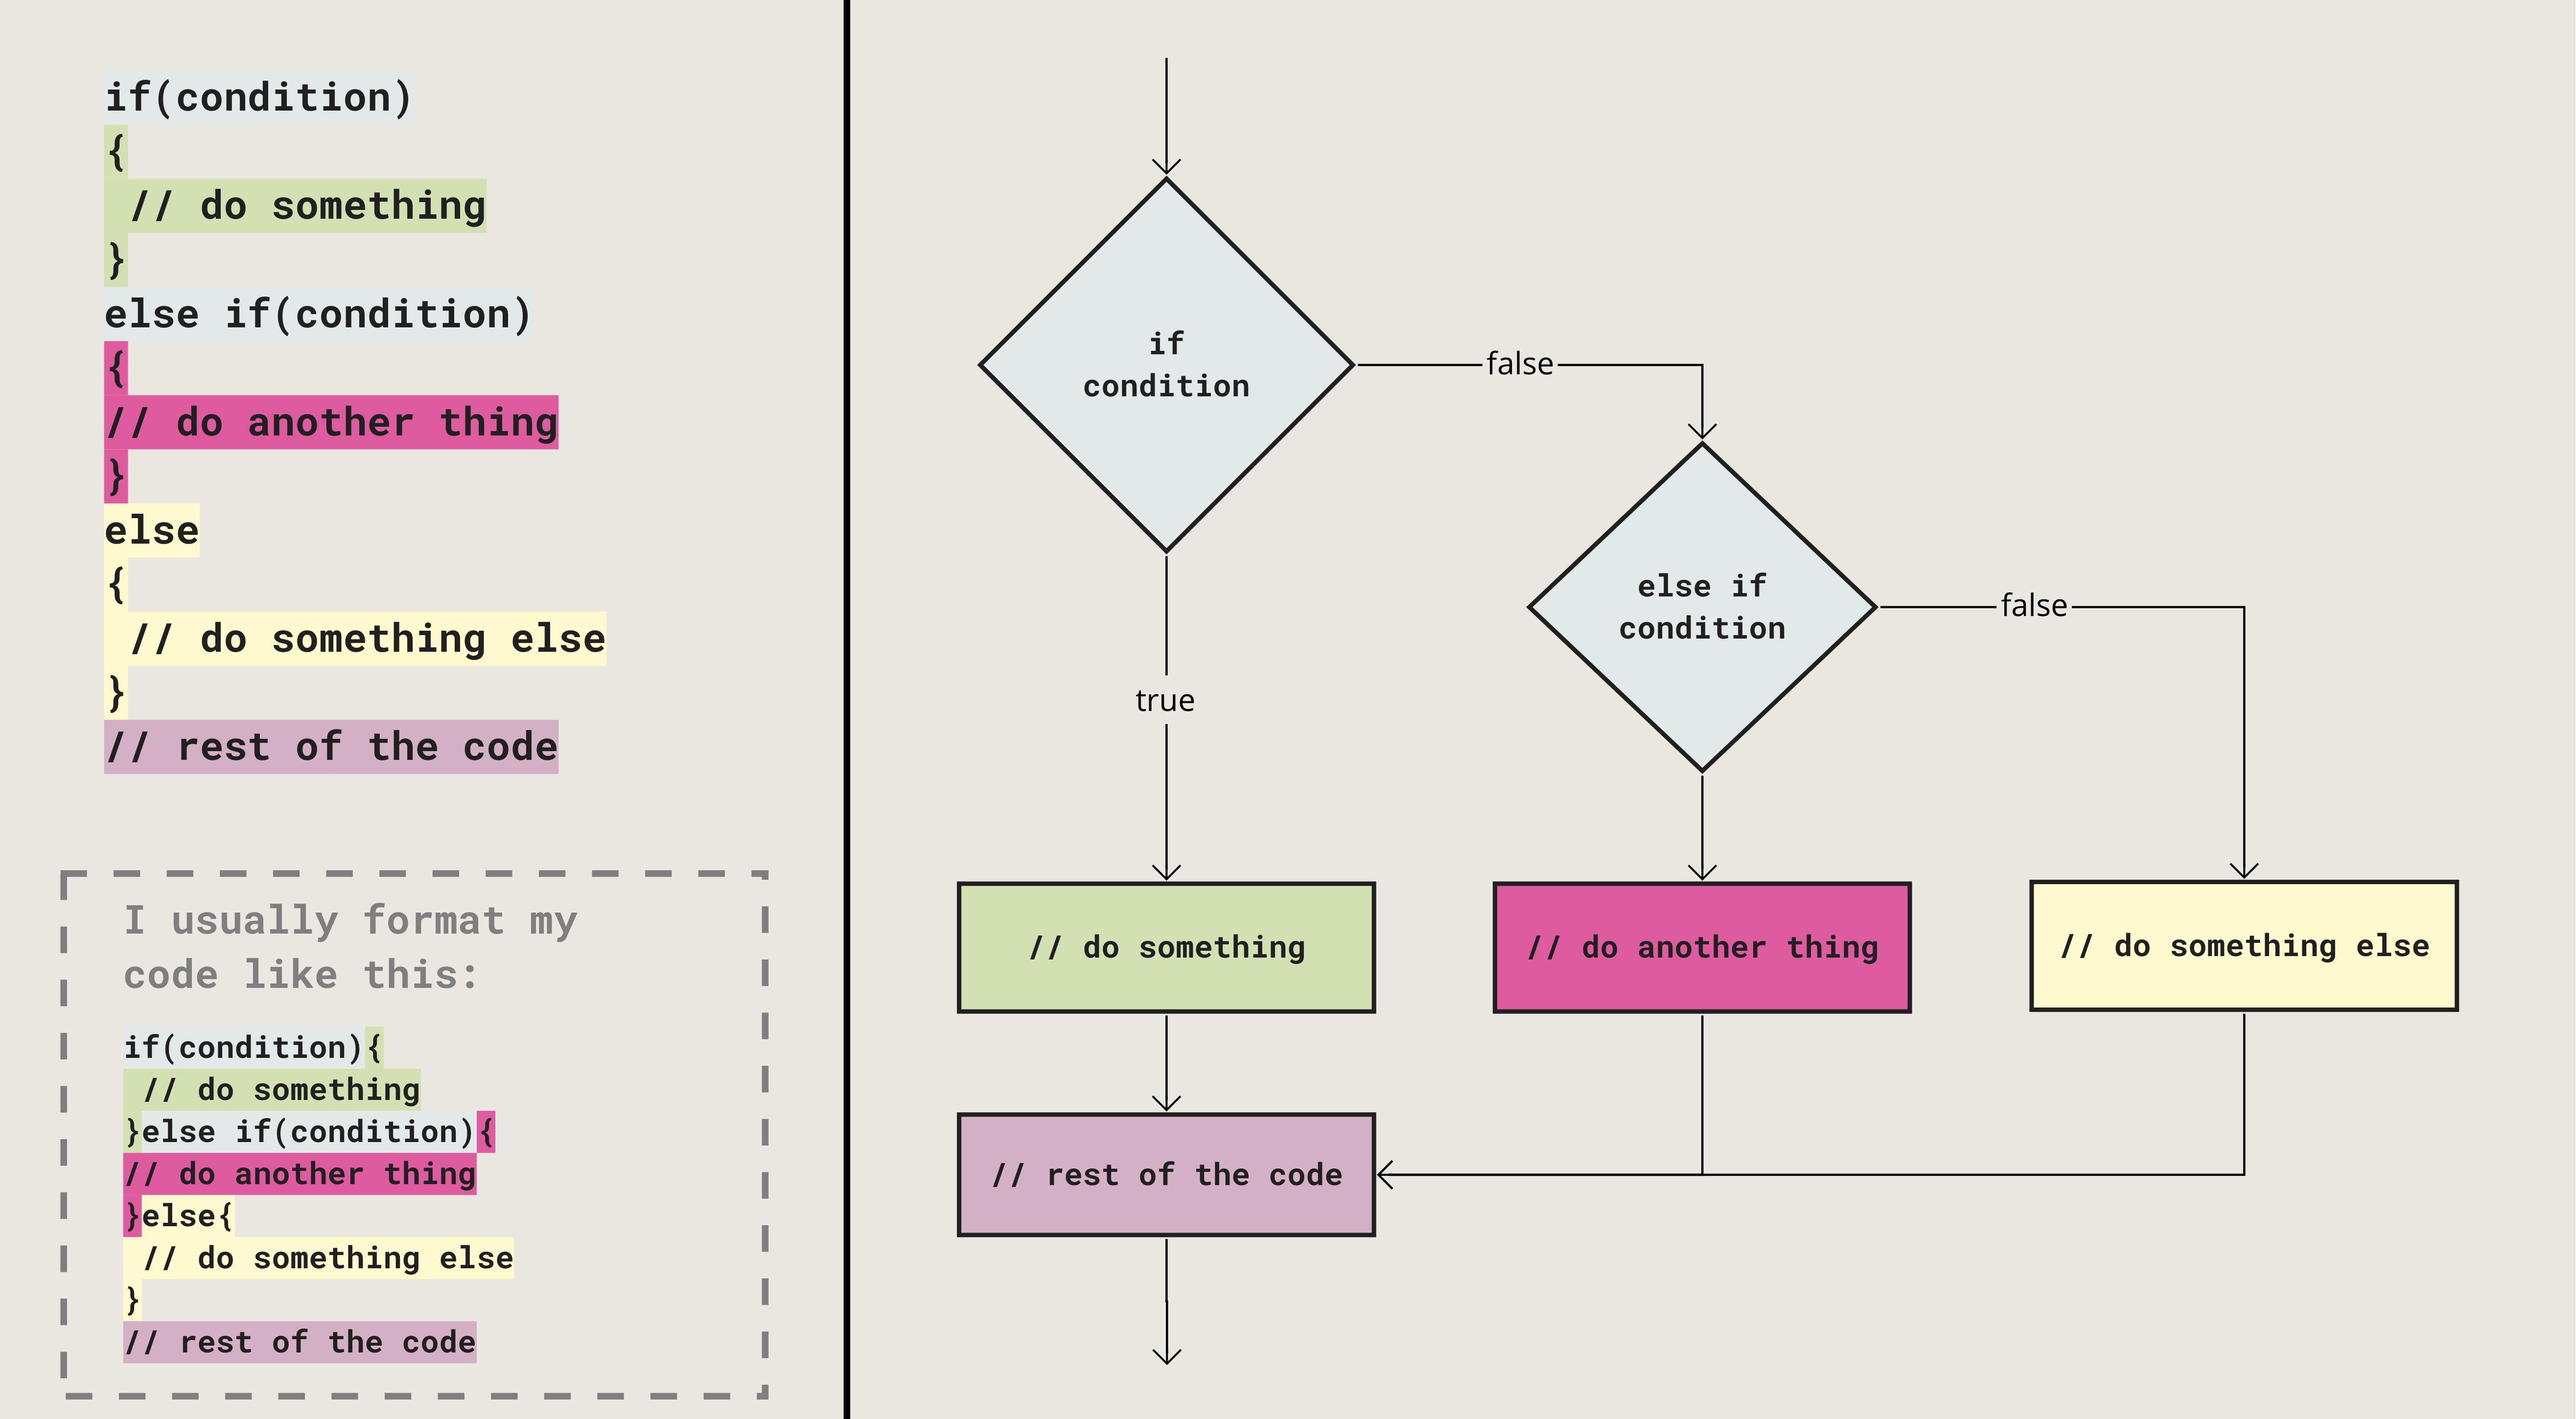
if (mouseX < width/4) {
  console.log("left side: zone one");
}else if(mouseX < width/2){
  console.log("left side: zone two");
}else{
  console.log("right side");
}
This structure can get a litlle bit confusing. Especially, when you are just starting to work with code. I would recommend using separate if statements for now instead of the else if.
Example #
Coming soon….
Resources #
To learn more about this topic, go through the following links: